
In the tallest towers of Castle Ravenloft, there sits a large room with a bed in the middle of it.
What is its purpose, why is it there, and why is there practically nothing else up there?
I have no idea, and neither does anyone else. So let’s put something else there!
Today we’re going over the Spires of Ravenloft area for Curse of Strahd. We’re making changes to the witch’s lair, Piddlwick II’s background, and even that weird empty room at the top of the tallest tower. As always, you can get all the information from the video below, the text below that, or you can get the full color PDF over on Patreon!

Get the full color PDF over on Patreon!
Spires of Ravenloft
Within the Spires of Castle Ravenloft, characters find themselves at the highest points of Strahd’s lair. Rooftops slick with rain, perilous drops, and murderous denizens abound here. In this chapter of the guide, we have fleshed out the area and its inhabitants.
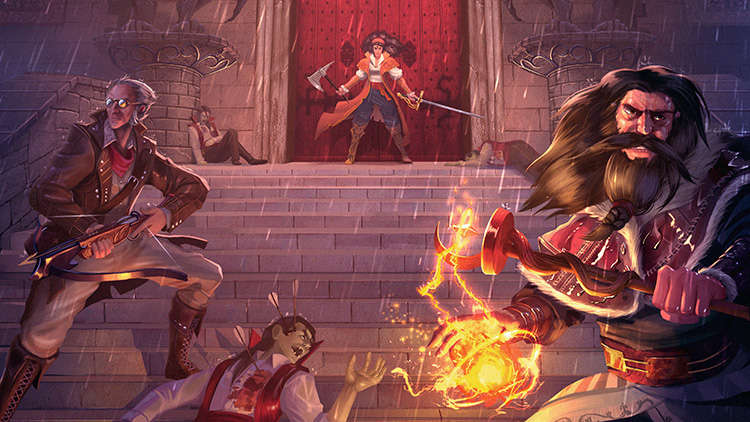
K47. Portrait of Strahd
The trapdoor to area K31a does not exist, as we removed the elevator trap in this guide.
The rug of smothering in this area does not immediately attack the first character to step on it. As a relatively weak combatant, its primary goal is smother its opponent and cause them to fall down the nearby staircase. To that end, it will wait patiently until there is a clear path to the staircase before attacking.
Any creature that the rug pushes down the stairs takes 1d4 bludgeoning damage per 10 feet of falling. Every 10 feet, the character may make a DC 10 Dexterity saving throw check to stop the fall. On a failure, they fall another 10 feet.
At your discretion, the guardian portrait here may remain a non-combatant. Instead, Strahd may use it as a means of surveillance as he magically looks through the eyes of the painting. With a DC 15 Wisdom (Perception) check, characters notice the eyes of the painting move as they look around the area.
K49. Lounge
Prior to becoming one of Strahd’s consorts, Escher was an adventurer trapped in Barovia, just like the characters. If the characters have not met Escher before, he is unaware of their exploits as he has fallen from Strahd’s grace and is not kept apprised of goings-on outside of the castle.
Escher is not immediately hostile when encountering the characters. Although he is reluctant to talk with them at first, he can be convinced to open up with a successful DC 13 Charisma (Persuasion) check. If the characters convince Escher that they share with him the common goal of escaping Barovia, and that they have a fighting chance to do so, he offers to aid them in whatever small ways that he can. Escher is incapable of physically acting against Strahd due to the nature of their ties, but he can provide characters with information about the castle and Strahd’s tactics.
If there are any Fortunes of Ravenloft items inside the castle, Escher knows where they are and can tell the characters where they are.
Should any character look out the window in this area, they see that a number of grotesque statues of winged beasts are set along the rooftop edge at irregular intervals. Any character with a passive Perception of 16 or higher catches one of these gargoyles moving. See area K53 for more details.
Get The Essential Guide To
Curse of Strahd
Years in the making, this guide to Curse of Strahd has enhanced thousands of games across the globe. It’s now yours in one convenient downloadable package.
K52. Smokestack
Any characters that come close to this smokestack while moving on the rooftop, or who attempt to enter it, are attacked by 1d4 smoke mephits. The mephits fight until defeated. Noise from this encounter alerts the gargoyles in area K53, who come to join the fray after three rounds.
K53. Rooftop
If any characters move across the rooftop, they are attacked by 1d4 + 2 gargoyles set along the edges; the rest remain inert but can animate at any time. There seems to be an almost inexhaustible supply. Over time, new gargoyles eerily take the place of those vanquished while nobody is looking.
K55. Element Room
Instead of the vampire spawn, a curious gargoyle might come investigate if the characters open a window.
If the characters rummage through the alchemical supplies stored here, they can find a rare spell component with a successful DC 14 Investigation check (maximum of one per character). These are consumed when used, even if the spell they are used in does not state so. See the Rare Spell Component table below for more details.
| d6 | Rare spell component | Spell | Effect |
|---|---|---|---|
| 1 | Extra-tart tiny tarts | Tasha’s hideous laughter | The target has disadvantage on the save against this spell and the spell can also target creatures with an Intelligence score of less than 4. |
| 2 | Barovian shadow herbs | Find familiar | The spell can summon the giant version of any creature usually summoned, e.g. a giant crab instead of a crab. |
| 3 | Burnt branching twig | Witch bolt | The spell can be cast on two targets (requiring separate attack rolls), as if twinned by a sorcerer. |
| 4 | Dream sand | Sleep | When rolling for hit points, add +2 for every d8 rolled. |
| 5 | Boar hide leather | Mage armor | The target’s AC becomes 15 + its Dexterity modifier. |
| 6 | Silver dragon holy water | Protection from evil and good | The protective effects on the target extend to any friendly creature within 10 feet of the target while the spell lasts. |
K56. Cauldron
The Barovian witches in this area do not automatically attack the characters. Instead, they try to gauge what their interests are and what brings them to Castle Ravenloft. They hope to relay this information to Strahd, to ingratiate themselves. They speak alternating between all witches present, finishing each other’s sentences:
“Oh, my sweeties!”—“What might bring…“—”…you pretties here, hm?”—“Hm?”—“Hm?”
The seven witches of the coven introduce themselves by name, if given the chance: Circe, Corvus, Cindy, Cassandra, Clarabelle, Craven, and Crecia. Corvus is their leader, and is in possession of a flying broom.
The witches are the middle of preparing the cauldron to reproduce potions. All ingredients and rites are complete, and the contents of the cauldron can now take on the properties of any potion that is poured into it. This yields 1d4 + 1 potions identical to that which was poured into it. The characters can deduce this effect with a successful DC 11 Intelligence (Arcana) check by looking through the notes and spell components scattered around the cauldron.
If combat breaks out, Corvus will try to escape on her broom through one of the windows in area K55. The gargoyles on the rooftops are friendly towards her and she returns to the fight with 1d4 + 2 of them within 1d4 rounds.
K57. Tower Roof
One particularly stocky gargoyle perches here. It has 77 hit points and its attacks deal 1d8+2 damage.
K58. Bridge
If the characters try to traverse this bridge, 1d4 + 2 gargoyles attack when they are right in the middle of their crossing. The gargoyles attempt to push or drag the characters off the bridge.
K59. High Tower Peak
As written, Pidlwick II was created by Fritz von Weerg. In the spirit of keeping things tied together, this guide will alter the origins of the clockwork man.
In the town of Vallaki, the Blinsky family has been making toys and contraptions for generations. Gadof Blinsky’s great great grandfather was particularly skilled in clockwork, and specialized in mechanical marvels that had a startlingly lifelike quality. One such creation was Pidlwick II, whom he created on commission for Duchess Dorfniya Dilisnya.
If the characters befriend Pidlwick II, he points frantically at a torn and faded label sewn into his trousers. He repeats this periodically until the characters assure him that they will return him to his creator. The label reads:
Master Toy Maker Mikhail Blinsky
Is No Fun, Is No Blinsky!
If Pidlwick II is returned to Gadof Blinsky in Vallaki, the toymaker will do his best to reward the characters. He has very little money, but is willing to part with as much as 10 gold pieces and whatever toys he has in the shop.
Unfortunately for Gadof, Pidlwick II is not happy being returned to anyone but his creator, Gadof’s great great grandfather. Within 2d4 days, Pidlwick II smothers Gadof in his sleep and then continues to “entertain” random townspeople every night.
K60. North Tower Peak
As written, this area contains little more than manacles, a bed, and a chest containing a crown. Because these items have little connection to anything else in the module or the castle, this guide recommends replacing the contents of this area entirely.
Instead, this area serves as a stable of sorts for Bucephalus. The perimeter of the area is lined with piles of straw that Cyrus brings up in order to feed the fiendish horse. Much of the straw has been burnt black by the flames that emit from Bucephalus’ body.
In the southern wall, from floor to ceiling, are a large set of double doors, beyond which lies only open air. When characters arrive in the area, the doors are latched shut on the inside. Strahd opens the doors in order to fly Bucephalus in and out.
Hanging from the northern wall are three leather saddles, all of equisite crafstmanship and worth 60 gold apiece.
When Bucephalus is not confined to its crypt, being ridden by Strahd or aiding him in battle, it can be found in this area. There is a 20 percent chance that Cyrus is present, tending to the nightmare. If encountered by the characters, Bucephalus is hostile toward them. If reduced to half health, Bucephalus will use its Ethereal Stride action to escape from battle, and will seek out Strahd at the earliest opportunity.